Hi everybody!
Today’s tutorial is quick and easy, but it has a big impact. To realize this tutorial you only need script Fu (here is an installation guide) and the IronMan font.
Start by creating a new document in Gimp (I’m using a 1920 x 1080 sized document). Apply a gradient (shade tool) and change the color from white to #f4f4f4.
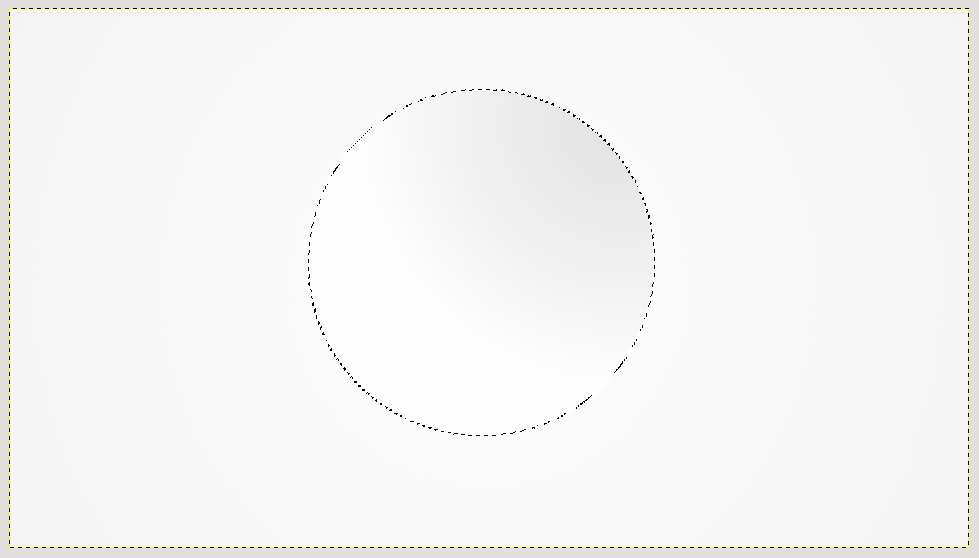
Click Elliptical selection tool and, holding SHIFT, trace a circle. Once the selection is active, select the gradient tool and regulate the color from light grey (#fefdf9) to a darker color (#e9ebea).
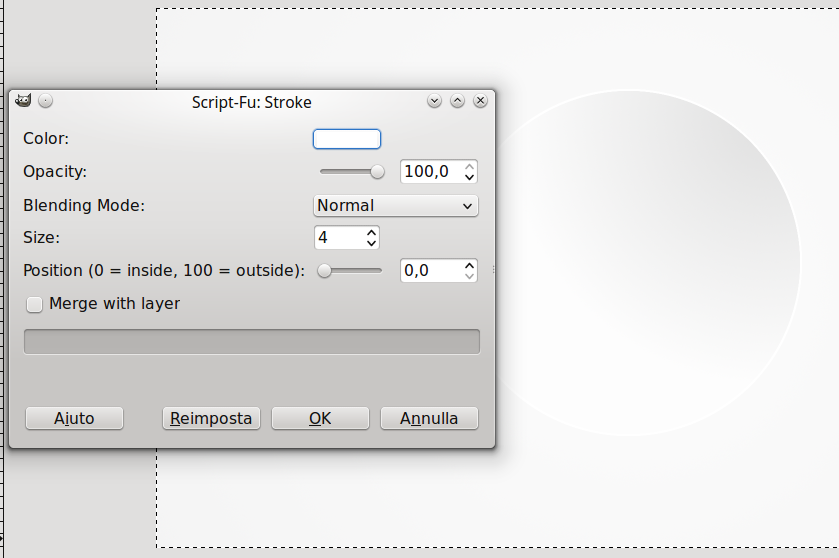
To better highlight the outline of the button you should draw a thin border (4px are perfect for the image size). Select Script-Fu–> Layer Effect–> Stroke configuring the settings below:
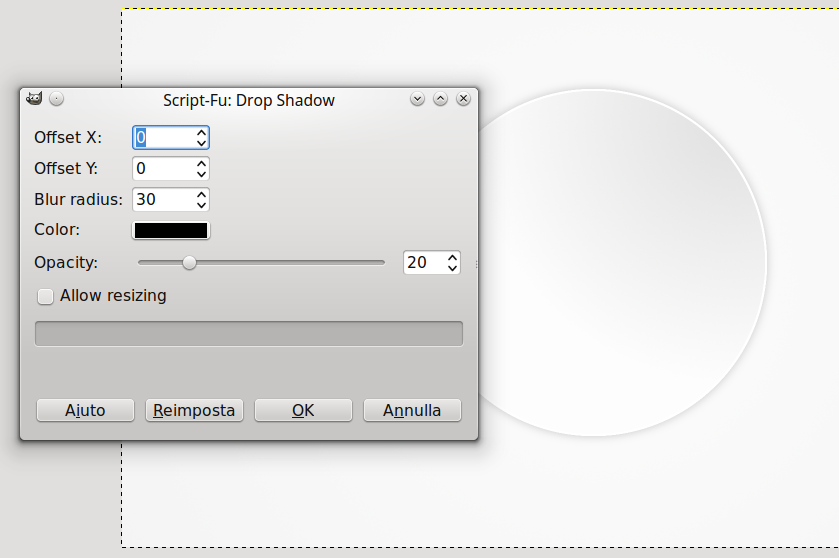
Once you have made the borders, create a small shadow to give a tridimensional effect and enhance the button. To realize the shadow, click on Script-Fu → LayerEffect—> Drop Shadow.
Now create a fold effect using the blur tool. Select the tool and set to the brush the same size as the button, set the frequency tool to 100 and duplicate the shadow layer.
Then drag the shadow on the bottom left side in order to give the shadow the same direction as in the button.
The button is finished, you only have to write the number you want. I used IronMan font (you can find the link at the beginning of this tutorial) and the color #2c2c2c (dark grey).

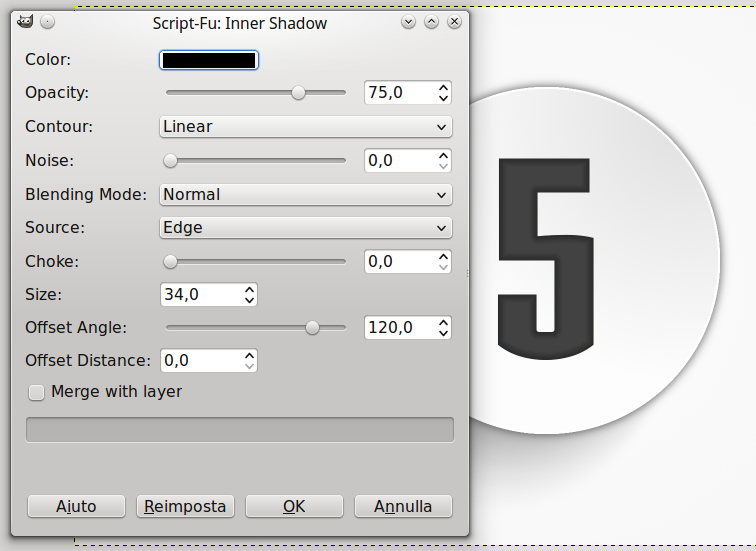
To enhance the number, create some inner shadows clicking on Script Fu—> Layer Effect—> Inner Shadow and configure the settings below:
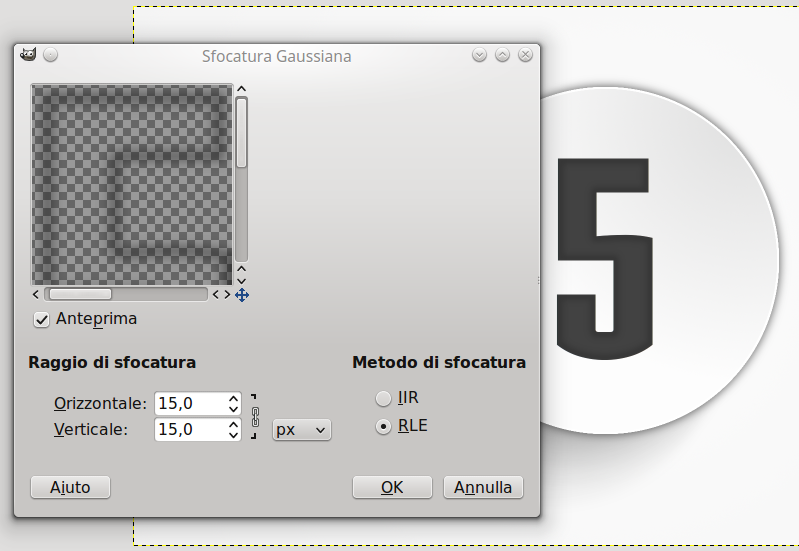
To weaken the inner shadows, blur them selecting Filters —> Blur—> Gaussian and set blur ray to 15.
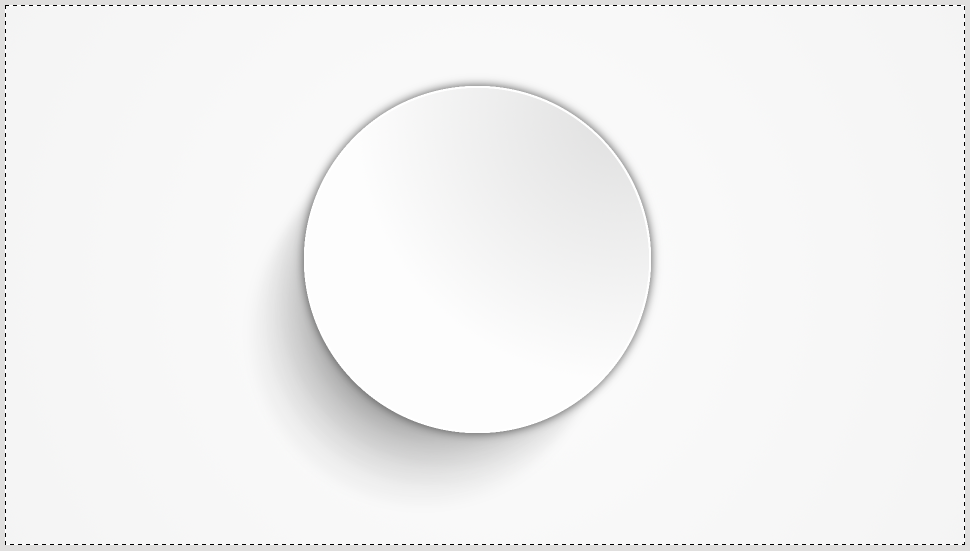
And this is the final outcome. I think it’s simple and smart, do you agree?