Hi guys! Welcome to my new Gimp tutorial! Today I will show you photo manipulation techniques by creating a flying castle.
You will need the following materials:
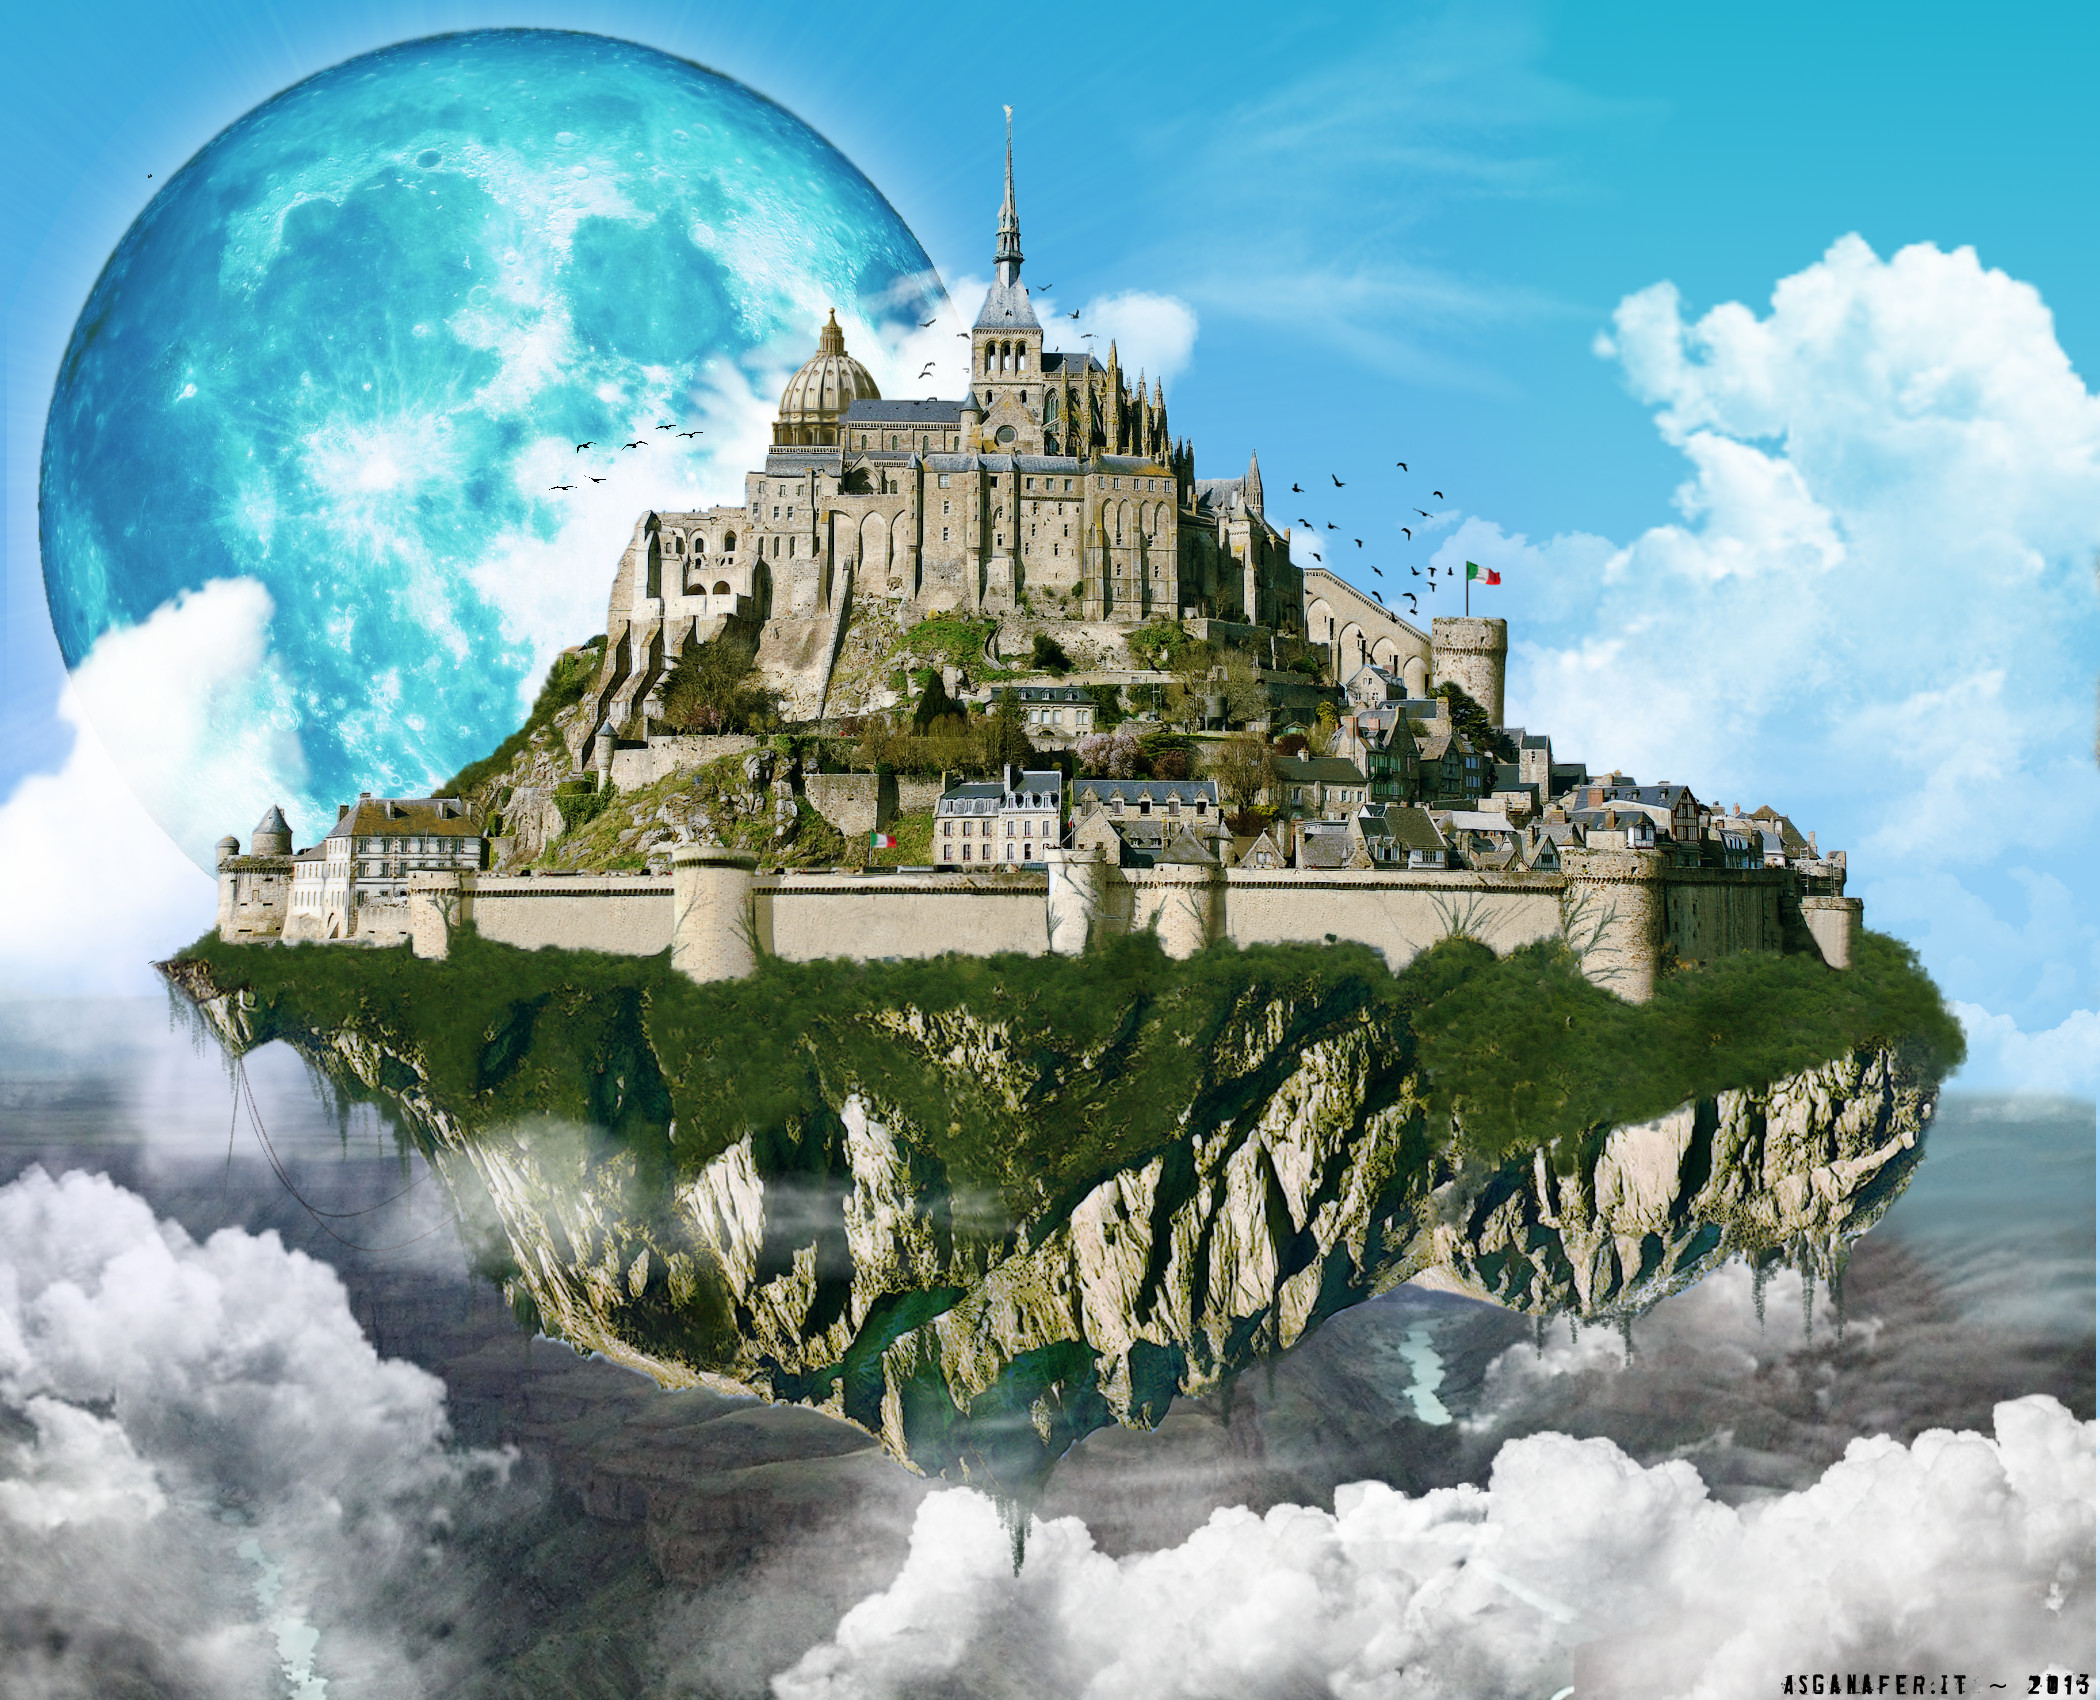
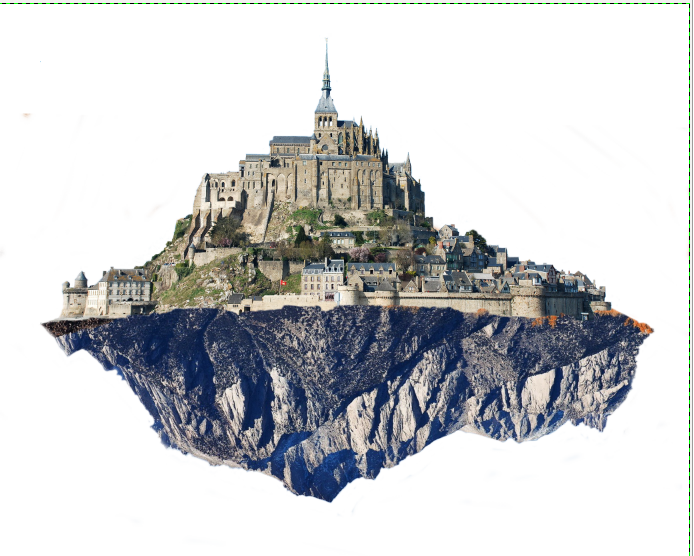
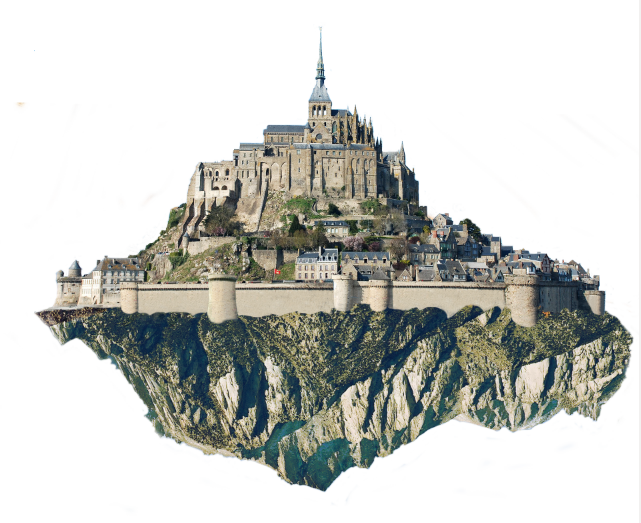
This is a preview of the final result:
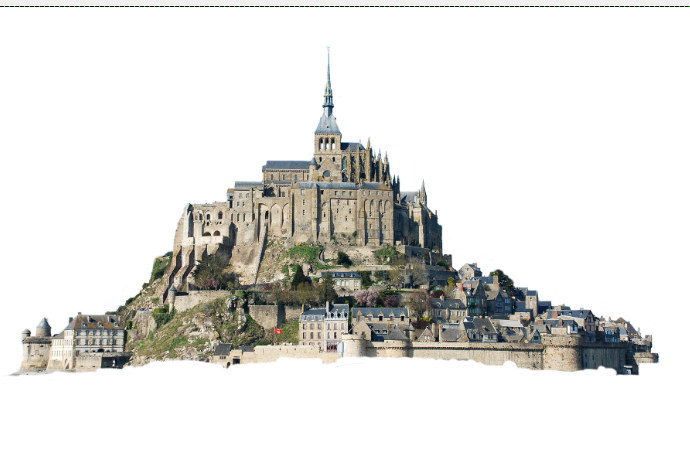
Open up the Mont-Saint-Michel Abbey image, right – click to create a layer mask.

Now block out the Abbey image, select brush tool (black color) and you will obtain this:
File—> Open as layer and select the mountain image: it will be the ground on which the Abbey stands.
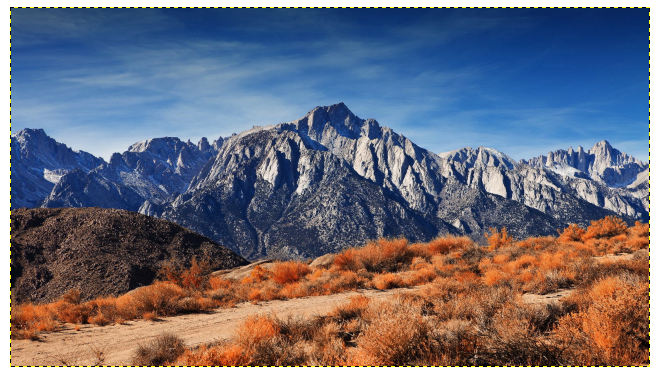
Use rotation tool to overturn the mountain, try to match the mountain base with the Abbey one. If it does not fit perfectly, do not worry, we will solve this problem later.
Add a layer mask to the mountain image. Then block it out like this:
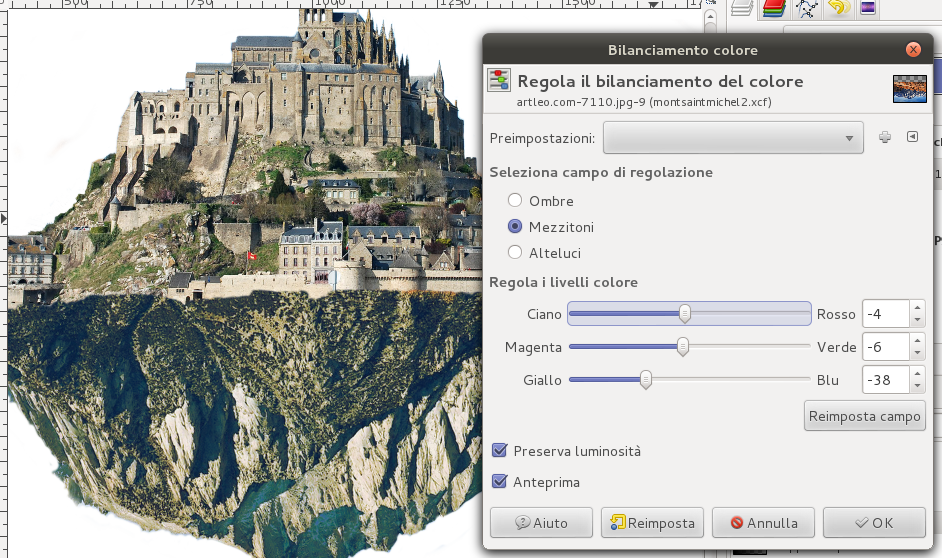
Now we should try to make the two images similar as much as possible. There are different factors that we must keep in mind, as light direction, light intensity, wind, colors and color intensity.
So now we will regulate, through color balancing, the color of the mountain to adapt them to the Abbey’s ones.
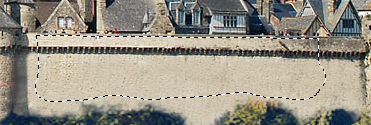
At this point, select clone tool to draw the lower part of the wall, which lays on the mountain. Consider also shadows and possible wall details.
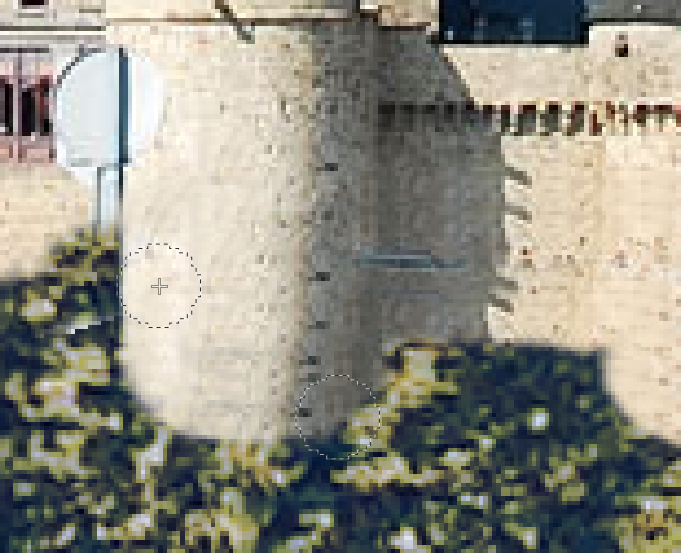
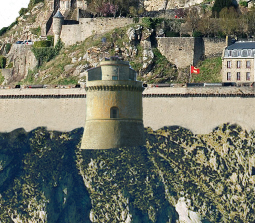
Looking at the image we can see that the towers seem to be built on the rock. In the next step I will explain how to copy the wall on the right of the second tower and move them on the left of the Abbey.
Select the section of the wall with freehand selection tool and paste it on a new layer. Repeat the process until you have finished, and correct possible flaws with clone tool.
Once our castle has solid walls around the whole perimeter, we can add an extra tower. Choose a tower image you like and crop the tower from there using a layer mask (you can choose the image you want, but the architectural style should be similar to the Abbey style).
Operating on the layer curves, make the tower the same color as the other walls with the help of clone tool, realise then the base of the tower.
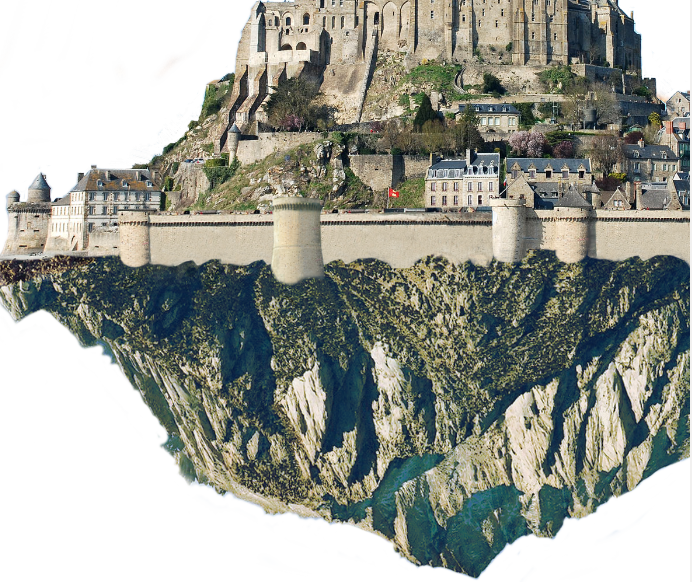
At this point you should get an image similar to the one below:
Next week I will publish the second part of the tutorial! See you soon!