In today’s tutorial I’m going to realize an artistic interpretation of the Superman logo! Before starting, you need to download and install this Script-Fu (here you can find the installation guide).
Begin by creating a new document in Gimp. I’m using a 1920×1080 sized document. Using the gradient tool (radial), fill the background changing the color from #111724 to #05080d.

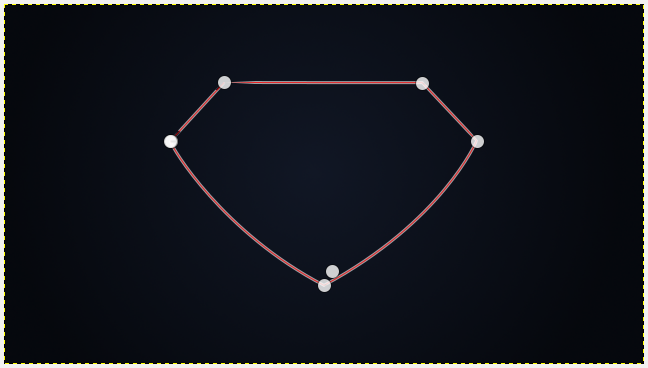
Then click paths tool and follow the Superman logo outline (if it’s too difficult, you can use an existing logo cast 😉 )
Now create a new layer. In the tool options you can find “Path selction“. A selection will appear: repeat the same process as for the background, changing the color from #fac128 to #cf9c14.
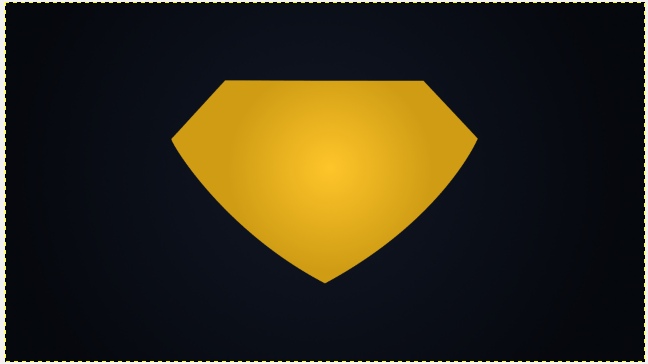
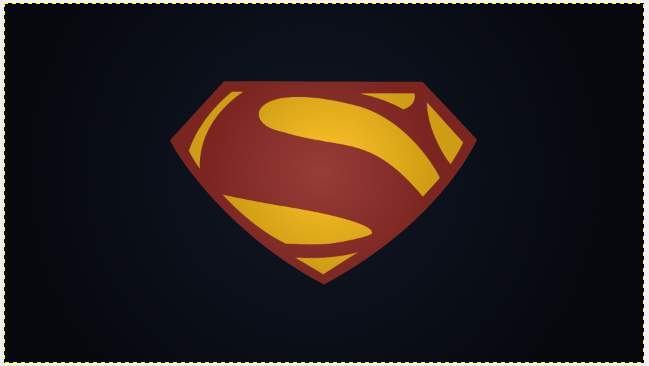
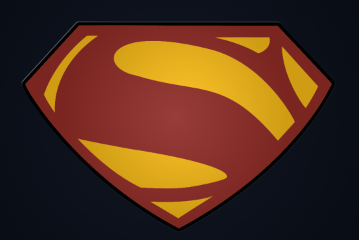
The last thing we need is the S for Superman. How cacn you realize it? It’s simple! Use the path selection tool and create the S like you did for the contour. This is what you should get:

Create a new level, then click “path selection” and color the selected part with the radial gradient from the color #973c38 to #7b2522.
Now you must define the contours. Right – click on the outline layer (the first you created) —> Alpha to selection.
Then click Select —>Enlarge and set 10.
Create a new layer (this one will have to be under the other two) and fill this section with black color.
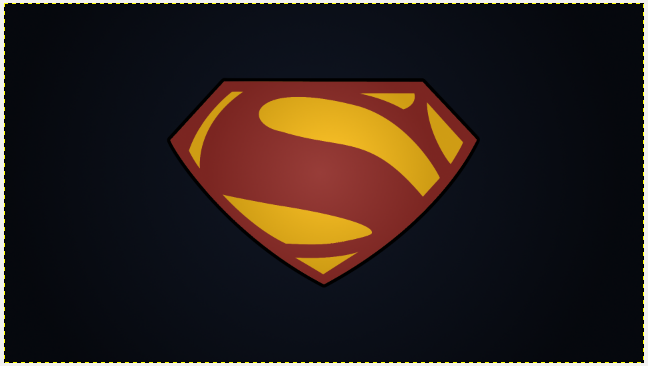
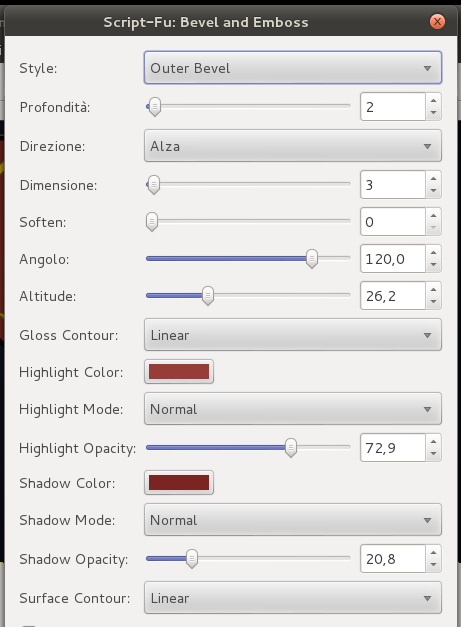
To create all the other contours you can use the Script-Fu installed at the beginning of this tutorial. Complete the black contour just created. Click Script-Fu—> Layer Effects—> Bevel and Emboss with this last layer acitve.
The result will be the following one:
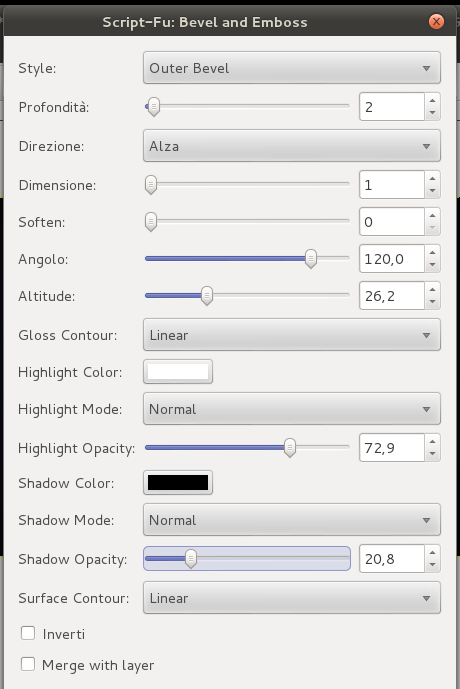
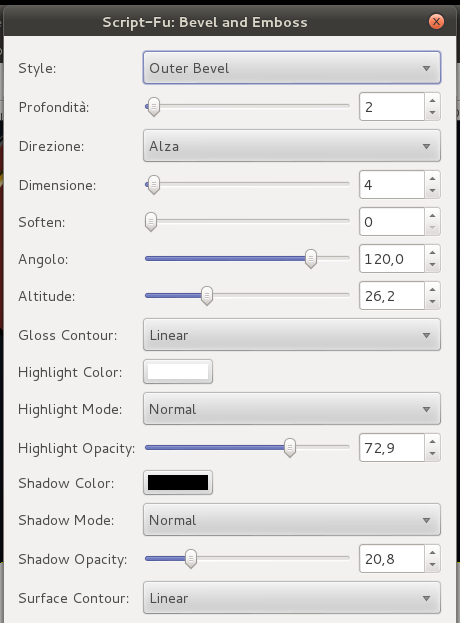
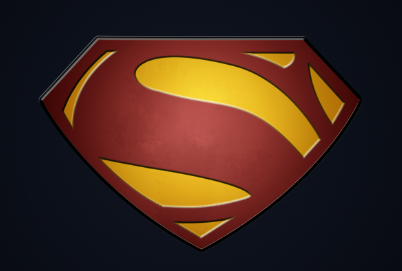
Now position the cursor on the layer which contains the red part of the logo. Click on Script-Fu—> Layer Effects—> Bevel and Emboss and configure the settings below (do it twice on the same layer):
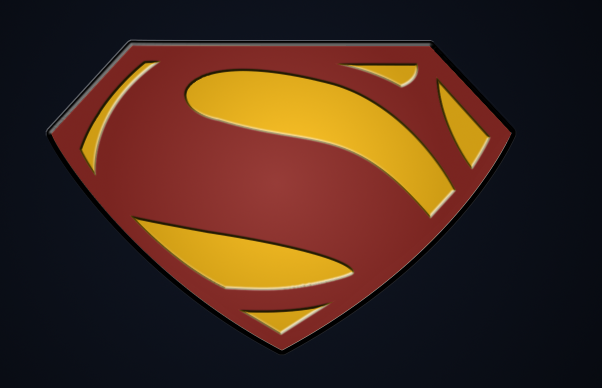
This will be the outcome:
At this point you just have to make this logo cooler. Merge all the layers together (excluding the background) in a directory. Right – click —> Alpha to Selection. Then create a new layer, select the gradient tool (radial).
Apply it to the selection and select the brush to “dirty” the central part.
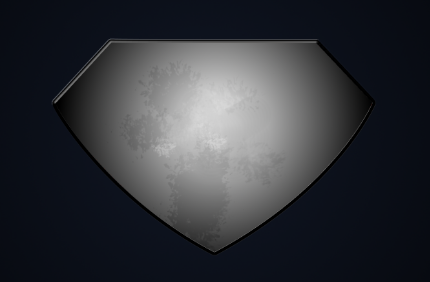
Change the layer settings from “Normal” to “Soft light“. This is what you will get:
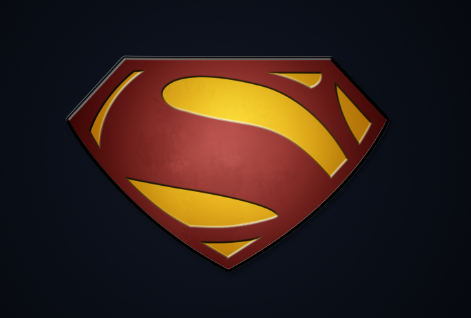
Merge the logo layer together and click on Filters—> Light and Shadow—> Cast shadow
Set opacity to 31.
Create a new layer right above the background. Use the brush with the color #151e31 (you can download a set of grounge brushes to obtain this effect or you can do it freehand, it’s up to you).
Now dirty the back of the logo in this way:
This tutorial is almost finished, there are only few steps. Create a new completely black layer, over all the others. Right-click and select “Add layer mask“.
Select the gradient tool, radial and apply it to the layer mask: the light will be in the centre, while the outer parts of the image will be darker.
Using the brush, dirty the layer mask like you did in the previous step, make some spots selecting the white color. You should obtain something like this:
Save the image, then click on File—>Open as layer and select the image just saved.
Filters—> Blur—>Gaussian and smooth the image to 20px. Set opacity to 80.
Right – click —> Add layer mask (white, full opacity). Using the gradient tool (radial), apply it on the layer mask.
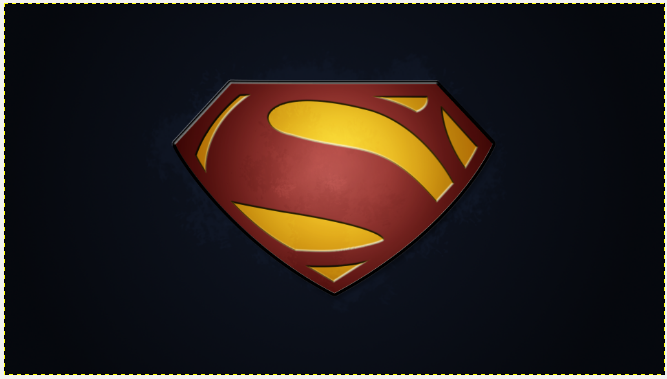
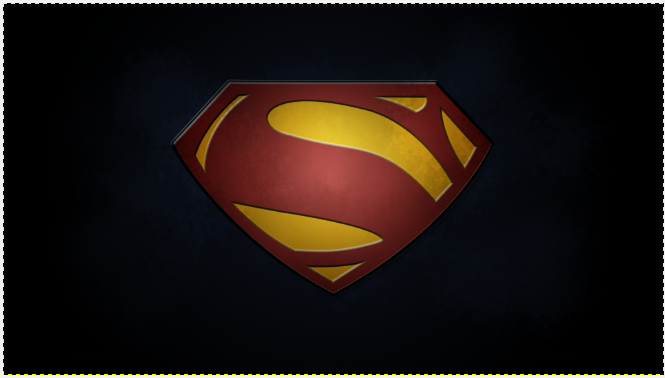
The final outcome will be this Superman logo. What do you think about it? Write it in the comment!
![]()